The database migration wizard will allow you to migrate the contents of a database created with EventSentry v2.43 or earlier to a database created with EventSentry version 2.50 or higher. The database migration wizard will not create or setup the destination database for you, so in order to use the database migration wizard you will need to perform the following tasks beforehand:
| • | Run the Database Setup Wizard to setup and prepare the (new) destination database. Do not remove the System DSN created. |
| • | If you have not already done so, read the database tuning tips before starting the migration. |
| • | Create a System DSN that points to the original database (this will already be present in most cases). |
Depending on the amount of data and the hardware used the database migration may take many hours. Since the new database layout is completely different from the original layout, all data will have to be translated which can take a long time. We therefore recommend that you run this wizard on a computer where the application can run without interruption. |
Starting the Wizard
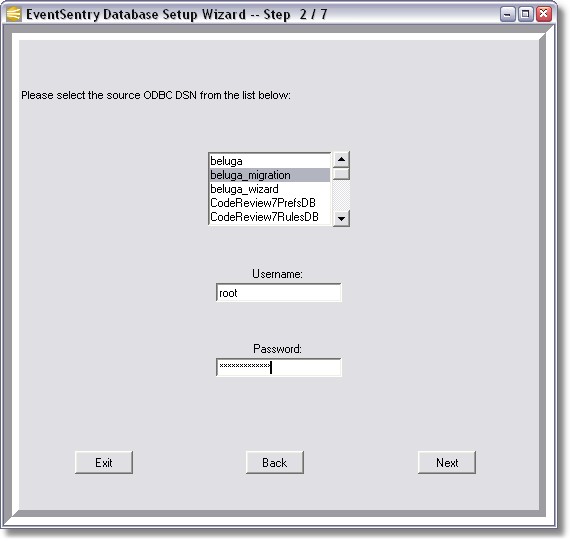
Start the wizard by navigating to Start -> Programs -> EventSentry and selecting Database Migration Wizard. After clicking next on the welcome screen you will see step 2, prompting you to select a DSN pointing to the source database which was used with EventSentry v2.43 or earlier.

Select the DSN pointing to the source database and enter a username and password with access to this database. After clicking Next you will be presented with a similar dialog where you will need to select the DSN that points to the destination database. After entering all required information click Next and you will be presented with step 4:

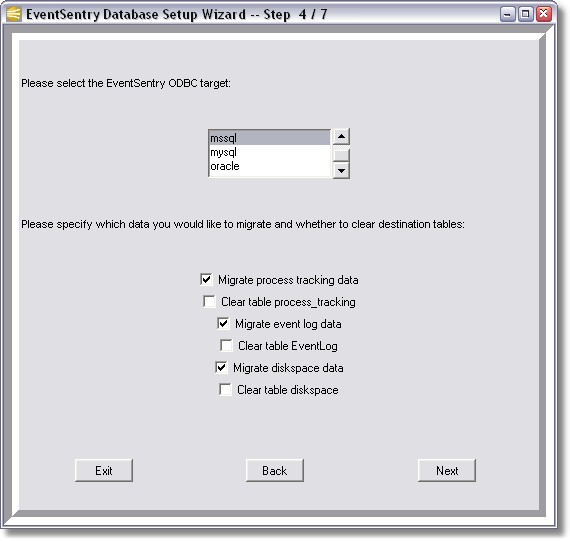
Here you can choose which data you wish to migrate to the new database. It is recommended that you keep your existing database for some time, even after the migration has completed successfully. If you select the "Clear table ...." checkboxes then all rows from the destination table will be cleared prior the to migration.
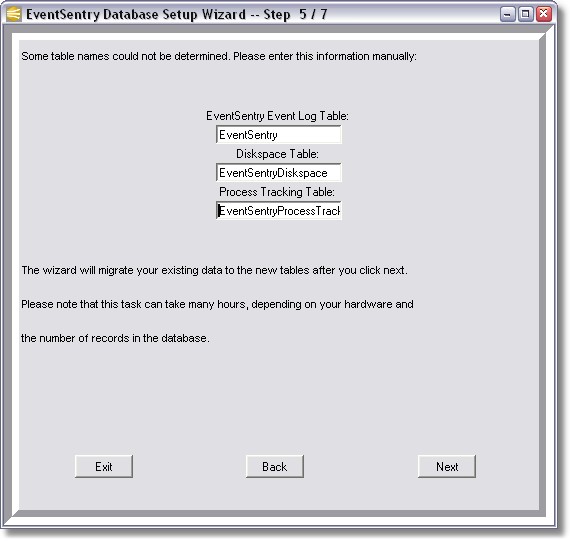
In step 4 you also select the ODBC target you were using in EventSentry prior to version 2.50. If the migration wizard cannot determine the table names used then you will need to specify those names in step 5:

After you have entered and/or verified the table names click Next to start the migration. After the migration is complete you will see a summary screen indicating which data has been migrated successfully to the destination database.
Please verify that all data has been migrated successfully using the web reports before you delete your data from the source database.